Wednesday, August 31, 2016

Organizing and Printing Student Roster from PowerSchool

1. Open Gradebook.  (Click here for how to access Gradebook through Power School).

2. Click on REPORTS.

3. Click on STUDENT ROSTER.

4. A new window will open:
5. Choose what information you would like and how it is organized.  The blank boxes under Parent Info are for if you want to put in your own column headers.  A sample of what the headers will look like will appear on the bottom.

  • Option - you may click on the LAYOUT tab and add additional notes, headers, or footer notes.
6. When ready to run the report, click on RUN REPORT.

7. A window will open.  Choose if you would like to open the report or save the report.  Then, click OK.  If you select SAVE REPORT a window will open to choose where to save it.  If you select OPEN REPORT, a PDF will open for you to print out.  Click OK.  Then, you should be all set.  If the chart is off the paper in preview, check that the scaling is set to FIT TO PAGE in the print dialog box.


Viewing IEP's Using Power School

1. Click on the backpack.

2. Click on a student's name (must have an IEP).

3. Click on SELECT SCREENS on the right side.  Then, select CENTRIS GROUP - IEP VIEWER.

4. An IEP Direct window will open up.

5. The IEP will then open in that window once it loads.


Tuesday, August 9, 2016

docAppender Google Forms Add-On

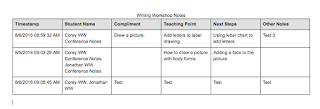
       docAppender works with Google Forms.  It takes what is put into a Google Form into a Google Doc for you.  This is great if you would like to use Google forms to take notes while working with students or parents.  The information is exported to a Google Doc based on your preference - vertical table, horizontal table, or bulleted list.  For example, if you are taking notes in a Google Form about a writing conference with a student, the information will be collected in a Google Doc specific to that student for you.  This is great if you want to go paperless or have access to your notes anywhere anytime without dragging a binder around.


Ways to use docAppender:
  • Note taking on student's skills, academic progress, or behaviors.
  • Note taking on parent / teacher communication.
  • Quiz / Test Taking / Quick Checks for students to take and teacher grades in Google Doc.
  • Feedback / Survey


Sunday, April 17, 2016

Using Blogger in the Classroom

**(8/9/2016 update)** - Please note - the Blogger App has been dropped from Chrome Web Store and Apple's store.  You can only get it on Android devices.  You can still use Blogger, you just have to log in through the browser on your iPhone or iPad.  If you previously had the app, you still have access to it, it's just not being updated.  I'm still using it.  The Blogger website is still being maintained.**
   
      Blogger is a free blogging app through Google.  You can create several blogs using your school email address or a private Gmail address.  What's great is that you can download the app to your tablet or phone.  When something happens in the classroom, you can open the app, take a picture, and comment about it.  If the device is too small, you can save the pictures, then use the computer to type up what you want to say.  You may also upload files from your computer to create blog posts as well.  Here are some blogs I have created or other teachers in our district have created: Classroom News, Home-School Connection, Students' Work Blog (only accessible to people in my class), Groton PV Technology Blog, LA Blog, and Mrs. Burton's Art Blog.  Below are some screenshots for you to see what the app looks like.  Below the pictures are some pros and cons...

How to Use the Blogger App:
1. Create an account: www.blogger.com
2. Download the app to a mobile device by searching for "Blogger."
    - Click here to learn how to add it to Google Chrome.
3. Open the app on your device.
        
4. If you have multiple blogs, select the blog you want to post to.  Otherwise, the first screen after logging in is this:
        
  • You may click on the camera icon to take a picture to post, or if you would like to type something you can click on the notepad and pencil icon at the top right or the "New Post" link with the orange pencil.
  • Below, I clicked on "New Post," then clicked on the camera icon.  This menu will pop up.  You can choose to take a new picture or upload one already on your phone.
        
  • If you choose to take a picture, the camera will open.  The capabilities of your device will determine if you can use a flash or not, or if you can flip the camera to the one facing you.  Click on the circle to take the picture.
        
  • A preview will pop-up asking if you want to use the photo or retake it.  Choose "Use Photo," then it will appear in the edit screen.
  • Type in what you would like to say above or below the picture.  If you turn the device sideways, the keyboard is a little bigger and easier to type.  You may choose to skip this step and do it on your computer.
        
  • Click the camera icon to take a new picture or click done in order to add a title.  In this picture, I'm adding a title.
        
  • Click "Save," then this menu will pop-up asking if you would like to just save it as a draft or publish it for others to see on your blog.  If you publish, another message will pop-up when it has posted asking it if you want to share it (like post it to Facebook or Google Plus).  I usually say no.  Sometimes I post things to Google Plus, but I haven't used that much for classroom communication purposes.
        
  • You will then be taken to an overview of all your blog posts.  If you click on a blog, you will get the options "edit, view, share, delete."
        
  • Sometimes when I do this online, the whole screen goes grey when I post something.  I just click the refresh button and everything appears as it should.  
Here are some pros, cons, and other things to think about...

Pros
  • Free
  • Easy to take pictures using phone or tablet.
  • Can edit posts on devices or on the computer.
  • Links with Google Chrome - don't have to log in each time to use it.
  • Layout on computer is user friendly.
  • Linked with all other Google Products
  • Few buttons to push - students (after being taught) can make their own posts.
  • You may allow parents or students to post comments to content.
  • You may embed the Remind app into your blog.
Cons
  • Depending on the size of your device - it can be tricky to add words if a picture is included in a post.  This can be challenging for students.  The way around this is to have students take the picture, then you place the cursor where they should type OR have them type what they want to say using the computer.
  • Security - if you want to secure your blog, only people with Gmail accounts will have access.  You can give parents their child's Google account information to log in if they don't have a private Google account.
Ways to Use Blogger in the Classroom
  • Classroom News - news about the classroom, allow students to blog about events in the classroom.
  • Student Works Blog - pictures of students working or playing in the classroom, students blog about things they built or things they learned.
  • Home-School Connection - information for parents / resources for parents to help support their child at home.
  • Blog sharing resources or websites.
  • Special Project - set up a blog where students post what they are learning about a specific topic.
Things to Think About
  • This is a useful tool for giving students an opportunity to blog, have an authentic purpose for writing, and an opportunity for students to read each others work.  It can help make another home-school connection.  Also, your blogs are saved that you can reuse certain common events from year to year by just changing the date of when it posts (such as Parent Teacher Conference reminders, field trip reminders, field day reminders, etc).


Thursday, February 4, 2016

Bloomboard Tip - Opening Tabs

When you are in Bloomboard, if you want to be able to see your goals while you work on your mid-year, it’s easy to open another tab. Just put your cursor on your name (in the black bar at the top of the page) and right click. Select “open link in new tab” and another Bloomboard page opens up, already signed in. Then you can just tab back and forth.  (From Mrs. Yolen)

Tuesday, February 2, 2016

Way Around Touch with Epson Projector

     If you have something you want to show on the board quickly (or want to touch), but don't want to write or have to turn off the sensor, here's a solution.  Change the mode to Projector mode.  If you do not select any tools, you won't have to worry about writing anything or interacting with what's on the board.  If you have selected a tool, just click on the eraser.  Then you can touch the board and nothing will happen.

Saturday, January 30, 2016

Follow the Path Board Game - Sight Words

       Have a student that needs to focus on specific sight words?  Download this template to create your own Follow the Path file folder game.  It was made in Powerpoint.  Just change the words to what you want your student to work on.  Then print it out and play!

Creating Your Own Worksheets / Game Boards

     I found this YouTube post that shows you how to create your own worksheets (like those on Teachers Pay Teachers.  I am also using this to help make games.  This is handy if you need to differentiate instruction.  I am working on creating my own templates to share through the LA Blog.

Sunday, January 24, 2016

ViewPure.com

     Have a YouTube video you'd like to show, but concerned about ads or students clicking on links?  Copy the YouTube link from the video you would like to show.  Go to ViewPure.com.  Paste the link into the search bar and click PURIFY.  The movie will appear on the ViewPure page without ads or side links.  This is really helpful if you want students to access a movie independently.

Here's an example...

YouTube Movie: https://www.youtube.com/watch?v=rD9dwkrUf8s&index=3&list=PLnOthrFzmyrAwb093569Z8ZNOZQTf6yr8

ViewPure Version: http://viewpure.com/rD9dwkrUf8s?start=0&end=0

Wednesday, January 20, 2016

Toolbox in ActivInspire

Here's how to change the setting of your toolbox in ActivInspire.  This is very handy if you want to use your interactive board or Promethean Board as a center, but don't want your students to have access to everything.

1. Click on VIEW, then CUSTOMIZE.


2. Click on the Command tab.  Then add or remove what you want your students to have access to.  The menu on the left is what you have to choose from, while the menu on your right is the Main Toolbar.  (If you click on Main Toolbox, you may choose Marquee tools - what shows up when you click on an object in ActivInspire).  Add or remove want you want in the Main Toolbox.


3. Click on SAVE AS (disk with a pencil) to save these profile settings as a new profile or SAVE if its how you want the toolbar to be for you.  


Turning Page Turn Gestures On / Off in ActivInspire

1. Click on VIEW, then CUSTOMIZE.


2. Click on the Settings tab.  Then, Dual Mode ActivBoards.


3. Check or uncheck the box (based on your preference) next to "Enable page turn gestures."


4. Click SAVE (or Save-As if you want this profile to be a special profile with or without turn page gestures).


Ideas for Using Interactive White Boards or Promethean Boards as a Center

       Your interactive board can be used for many different types of Center activities AND a good way to differentiate.  Here's some ideas on how to use your Interactive White Boards as a Center...

Promethean Boards (1 User)

  • Flipchart with a student's name assigned to each page
    • Easy to differentiate instruction
    • Over a couple days each student would get a turn to do their page.
  • Flipchart that students each get a turn to use.
    • I would put a color coded star next to their name on my center chart.  Each group would be divided in half so 1/2 the group would be at the board one day, then the other half the next day.
    • Can differentiate by having 2-3 pages where groups are assigned to a specific page
  • Interactive Website or Program - like ThinkCentral, Starfall, Pixie, Kidspiration
  • Project worksheet or graphic organizer for students to annotate using Desktop Annotate through ActivInspire
Epson Projectors in Computer Mode (Using Touch for Second Student)
  • Flipchart with a student's name assigned to each page
  • Flipchart that students share 
    • 1 student on pen, 1 student on touch if the activity requires writing
    • Up to 6 students could be at the board at once if they are only manipulating objects.
  • Interactive Website
  • Project worksheet or graphic organizer for students to annotate using Desktop Annotate through ActivInspire OR turn off Touch Input and have them write using the white board and dry erase marker.  Can also use the document camera to project something for students to write on.

    Epson Projectors in Projector Mode (2 students on pen, 2-6 students using finger but must agree to the tool they will use - erase or write).
    • Flipchart, document, document under document camera, or website that students can annotate over but not have to manipulate the document (turning the page, scrolling up or down). 
    Epson Projectors with Dual Mode in ActivInspire (max - 2 students on pens, 1+ students on touch (but students using touch must agree on what tool they are using :)).  **Requires a request for a driver update through SchoolDude to make Dual Mode functional on our computers.**
    • Flipchart with a student's name assigned to each page
    • Flipchart that students share 
      • 2 students on pen, 1 student on touch - all 3 can write and interact with the flipchart independently
      • Up to 6 students could be at the board at once if they are only manipulating objects.
    • Interactive Website (only 1 student can use a website because websites are designed for only 1 user at a time).
    • Project worksheet or graphic organizer for students to annotate using Desktop Annotate through ActivInspire OR turn off Touch Input and have them write using the white board and dry erase marker.  Can also use the document camera to project something for students to write on.
    Work done in flipcharts can be printed out as evidence of student work for assessments or be sent home.  Click here to see how to print out flipcharts.

    Click here to learn how to change what buttons are available to students in the ActivInspire toolbar.
    Click here to turn on/off page gestures in ActivInspire.


    Some ideas for Centers...
    Don't forget to check out Promethean Planet!

    Language Arts

    • Word Work activities - there's an alphabet chart you can use as a template available in the browser of ActivInspire or ask me (Corey) for a template.
      • build words - say it, make it, write it.
      • Embed sound files - record your self saying a word and students have to write it or make it with letters
    • Finding letters, words, spelling patterns, syllable parts by highlighting or circling.
      • Name Recognition / Get to Know You Activities - take students pictures and put them into the flipchart to match with their name or spell using the letter tiles
    • Writing letters or spelling words practice
    • Written response to a task
    • Reading Center - poem, article, online text (like texts from Raz-Kids or Starfall).
    Math
    • Interactive tools - calculator, ruler, protractor, dice, timer
    • Writing numbers
    • Solving Math Problems
    • Acting out Math problems
    • Showing how to make a number in different ways
    Art 
    • Drawing a picture to be used in a story (digital or print out)
    Science
    • Measurement tools - thermometer, balance, scale templates available in the Browser and on Promethean Planet


    Saturday, January 16, 2016

    Adding Blogger to Chrome Dashboard

    **(8/9/2016 update)** - Please note - the Blogger App has been dropped from Chrome Web Store and Apple's store.  You can only get it on Android devices.  You can still use Blogger, you just have to log in through the browser on your iPhone or iPad.  If you previously had the app, you still have access to it, it's just not being updated.  I'm still using it.  The Blogger website is still being maintained.**
       
         If you'd like to add Blogger to your Chrome Apps, but are having trouble finding it in the Chrome Web Store click this link!  Make sure you are logged into Chrome with the account that you blog with.  Once at the website, click ADD TO CHROME.  It will add the Blogger app to your Chrome Apps.

    Friday, January 8, 2016

    Classroom Chart for Each Student!

          With TCRWP's several different charts, here's how you can make it so each student has one in their own Writing Folder!

    1. Take a picture with your phone and email it to yourself.

    2. On your computer, print out the email setting it to have the picture take up the whole page.
    3. Put the chart in a sheet protector and add it to your students' writing folders.

    ***Students needed to be able to reference this chart during a lesson.  We used dry erase markers to check off if we did each step when writing our stories.***

    Monday, January 4, 2016

    Plickers - Class Voting Using Your Tablet or Smartphone

          If you have a tablet or smartphone and would like to do Class Voting, try out Plickers!  Ms. Johnson has used in with a couple classes.  You download the app to your tablet or smartphone.  Print out the cards from the website.  Setup an account on the Plicker's website.  Create your questions.  Then, when you ask the question, the students holds up a card to show their answer, your device reads the cards to record the answers.  Visit their website for more information!

    Sunday, January 3, 2016

    Saving PDF from Site to Google Drive / Printing to Drive

           This post is helpful if you have a large PDF file that you want to save or only a portion of a large PDF file you want to save to Google Drive.  This is just like printing only certain pages of a document, but instead of printing the document out, you are saving it to your Google Drive to use again and again.

    Ways to Use This Post

    • Save a specific unit from a larger PDF document.
    • Save an activity you want to reuse each year from a larger PDF document.
    • Save an article or PDF from a website (in this case, I saved the K ST Math Scope and Sequence to put in the Curriculum's Grade K Math Folder).


    1. Make sure you are logged in to your Chrome account.


    2. PDF's will pop-up in preview mode.  Move the mouse over the document, you will see the print icon appear in the top right corner.  (If what you want to print isn't in preview mode, go to FILE > PRINT).


    3. A Print Preview window will open.  Go to DESTINATION and click CHANGE.

    4. Scroll down to the section "Google Cloud Print."  Select SAVE TO GOOGLE DRIVE.

    5. The destination will then say "Save to Google Drive" and will list underneath it the Google account it will send it to.  Click SAVE.

    6. The file will be saved in your MY DRIVE folder.  To find it easily, go to RECENT.  It will be the first file in the list.

    7. To change the file's name and location...
    • Click on the file.  
    • Click on the three dots OR right click on the file name.
    • Select your action - CHANGE NAME or MOVE TO.


    • If you move the file to a new folder, it will still appear in your RECENT folder, but it will also be in whichever folder you assigned it to.