Showing posts with label Epson Projector. Show all posts
Showing posts with label Epson Projector. Show all posts
Tuesday, February 2, 2016
Way Around Touch with Epson Projector
If you have something you want to show on the board quickly (or want to touch), but don't want to write or have to turn off the sensor, here's a solution. Change the mode to Projector mode. If you do not select any tools, you won't have to worry about writing anything or interacting with what's on the board. If you have selected a tool, just click on the eraser. Then you can touch the board and nothing will happen.
Wednesday, January 20, 2016
Turning Page Turn Gestures On / Off in ActivInspire
1. Click on VIEW, then CUSTOMIZE.

2. Click on the Settings tab. Then, Dual Mode ActivBoards.

3. Check or uncheck the box (based on your preference) next to "Enable page turn gestures."

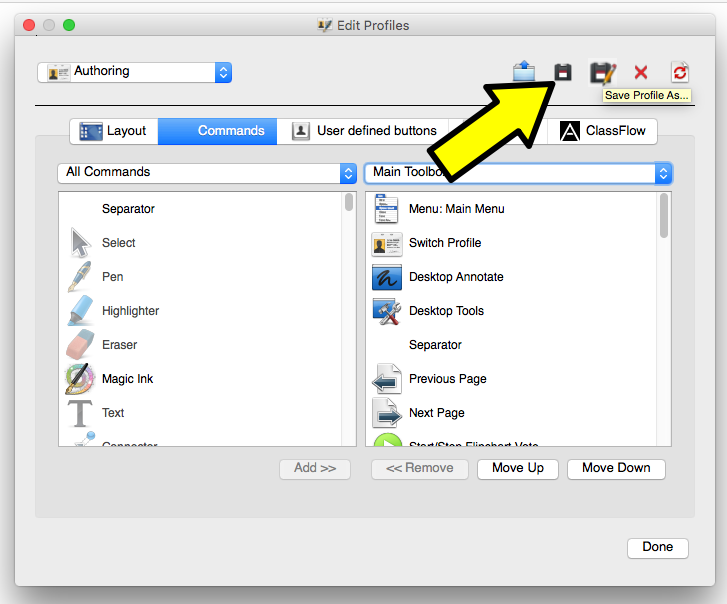
4. Click SAVE (or Save-As if you want this profile to be a special profile with or without turn page gestures).
Ideas for Using Interactive White Boards or Promethean Boards as a Center
Your interactive board can be used for many different types of Center activities AND a good way to differentiate. Here's some ideas on how to use your Interactive White Boards as a Center...
Promethean Boards (1 User)
Promethean Boards (1 User)
- Flipchart with a student's name assigned to each page
- Easy to differentiate instruction
- Over a couple days each student would get a turn to do their page.
- Flipchart that students each get a turn to use.
- I would put a color coded star next to their name on my center chart. Each group would be divided in half so 1/2 the group would be at the board one day, then the other half the next day.
- Can differentiate by having 2-3 pages where groups are assigned to a specific page
- Interactive Website or Program - like ThinkCentral, Starfall, Pixie, Kidspiration
- Project worksheet or graphic organizer for students to annotate using Desktop Annotate through ActivInspire
Epson Projectors in Computer Mode (Using Touch for Second Student)
- Flipchart with a student's name assigned to each page
- Flipchart that students share
- 1 student on pen, 1 student on touch if the activity requires writing
- Up to 6 students could be at the board at once if they are only manipulating objects.
- Interactive Website
- Project worksheet or graphic organizer for students to annotate using Desktop Annotate through ActivInspire OR turn off Touch Input and have them write using the white board and dry erase marker. Can also use the document camera to project something for students to write on.
Epson Projectors in Projector Mode (2 students on pen, 2-6 students using finger but must agree to the tool they will use - erase or write).
- Flipchart, document, document under document camera, or website that students can annotate over but not have to manipulate the document (turning the page, scrolling up or down).
Epson Projectors with Dual Mode in ActivInspire (max - 2 students on pens, 1+ students on touch (but students using touch must agree on what tool they are using :)). **Requires a request for a driver update through SchoolDude to make Dual Mode functional on our computers.**
- Flipchart with a student's name assigned to each page
- Flipchart that students share
- 2 students on pen, 1 student on touch - all 3 can write and interact with the flipchart independently
- Up to 6 students could be at the board at once if they are only manipulating objects.
- Interactive Website (only 1 student can use a website because websites are designed for only 1 user at a time).
- Project worksheet or graphic organizer for students to annotate using Desktop Annotate through ActivInspire OR turn off Touch Input and have them write using the white board and dry erase marker. Can also use the document camera to project something for students to write on.
Work done in flipcharts can be printed out as evidence of student work for assessments or be sent home. Click here to see how to print out flipcharts.
Click here to learn how to change what buttons are available to students in the ActivInspire toolbar.
Click here to turn on/off page gestures in ActivInspire.
Some ideas for Centers...
Don't forget to check out Promethean Planet!
Language Arts
Click here to turn on/off page gestures in ActivInspire.
Some ideas for Centers...
Don't forget to check out Promethean Planet!
Language Arts
- Word Work activities - there's an alphabet chart you can use as a template available in the browser of ActivInspire or ask me (Corey) for a template.
- build words - say it, make it, write it.
- Embed sound files - record your self saying a word and students have to write it or make it with letters
- Finding letters, words, spelling patterns, syllable parts by highlighting or circling.
- Name Recognition / Get to Know You Activities - take students pictures and put them into the flipchart to match with their name or spell using the letter tiles
- Writing letters or spelling words practice
- Written response to a task
- Reading Center - poem, article, online text (like texts from Raz-Kids or Starfall).
Math
- Interactive tools - calculator, ruler, protractor, dice, timer
- Writing numbers
- Solving Math Problems
- Acting out Math problems
- Showing how to make a number in different ways
Art
- Drawing a picture to be used in a story (digital or print out)
Science
- Measurement tools - thermometer, balance, scale templates available in the Browser and on Promethean Planet
Sunday, December 27, 2015
ActivInspire Setup with Touch
If you have an Epson projector, these steps will help ActivInspire work better with the interactive touch.
1. Under FILE, go to SETTINGS.


1. Under FILE, go to SETTINGS.
2. Go to DUAL MODE ACTIVBOARDS.
3. Check to see that these are the options you have selected.
- Touch Input - Touch and ActivPen
- Touch Interoperability - Default
- Default Tool for Touch - recommend SELECT
- Default Object Interaction Mode - Any
- Enable Page Turn Gestures - your choice (if you don't like pages to turn with a swipe, uncheck this box).
- Enable Touch Pen and Zoom - recommend uncheck this
4. Click DONE to save the changes.
Epson Brightlink Projector Training
Click here for notes from the Dec. 12th training. Includes links to Epson's website for other tutorials.
Click here for the Epson Brightlink Projector User's Guide
Click here for the Epson Brightlink Projector User's Guide
Wednesday, December 16, 2015
Hooking Up to Epson Projector (Serial Cable)
In our district there are two ways to hook a computer up to an Epson Projector - using HDMI or Serial cable. All desktops are hooked up via Serial cable, USB, and Audio. In this post, we'll learn how to connect using serial cable (with USB for touch/pen and Audio cable for sound). This post is if you need to unplug the serial cable from the desktop in a room and connect it to your laptop (Mac users require a Thunderbolt adapter to serial connector to accomplish this).
- I recommend using the HDMI connection if you're hooking your laptop up for a quick presentation - it only requires two wires. Click here to see how to use HDMI instead of serial cable connection.
- **If you have an extra serial cable in the room, connect it to your laptop. Disconnect the desktop serial cable connection at the wall outlet and connect your laptop's connection. See below how to switch the input if you're seeing a blue screen.**
- The picture below shows the different options at the wall outlet.


Here's how to connect your laptop to the projector if you have to disconnect the projector from a desktop computer...
1. Disconnect the serial cable at the back of your desktop. **Make sure that it's unscrewed before pulling it out!**

2. Connect the serial cable to your computer. **Make sure the prongs are aligned before pushing in AND you should screw it in to ensure that the connection doesn't get jostled and bend the prongs.** (This will take care of the picture).

3. Disconnect the audio cable from your desktop. Plug it into your laptop. (This will take care of sound).


4. Disconnect the USB cable from your desktop. Plug it into your laptop. (This will allow touch and pens to work).


5. Turn the projector on using the power button on the projector or use the remote.

6. If you have a blue screen, you must change the input to COMPUTER 1. You can use SOURCE SEARCH on the remote or the projector (see above picture) or use the menu on the board following these steps...
- Click on the bottom right of the board. Click on the up arrow.

- Select the INPUT icon.


- If your computer has never been connected to an Epson Projector, it may take 30 seconds to 1 minute for it to set up the drivers. A message will pop-up in the bottom right corner when the drivers are installed. It'll say something like "your USB device is now installed."
- Now you are set to go!
- Mac Users - Pens will work, but on my computer I couldn't get touch to work (as of 12/16/2015).

- If you want to interact with the computer from the board, make sure you are in PC Interactive Mode (computer and mouse icon). If you don't need to interact or only want to annotate over what's there, you can be in PC Free mode (projector and pen icon). Click here to learn the differences between the two.

- In another post, I will share tips and tricks for using ActivInspire with the Epson Projector - dual mode, touch input, and multi-users.
Epson Projector Tools Menu
The Epson Projector's toolbar is built into the Projector. Keeping that in mind, you can not save any annotations you make with the Epson Toolbar (except with a camera - phone/digital/or tablet).


- If you select Whiteboard mode, you can choose from different grids or lines that will be projected onto the board for you.
Epson Projector Menu
The Epson projector has a menu allowing you to control actions of the projector - Power, Input, Zoom, No Show, Freeze, and volume controls. So if you remote dies, you still can use your projector. Here's how to access the menu...

1. Click on the bottom right corner of the board. Click on the up arrow. The Menu bar will appear.


2. Select what tool you would like to use. (If you need to change between PC Mode and Projector mode, select the PC Interaction icon or Projector Interaction icon (upper right).

Hooking Up to Epson Projectors (HDMI Connection)
In our district there are two ways to hook a computer up to an Epson Projector - using HDMI or Serial cable. This picture shows the different types of connections that can be used with the projector. In this post, we'll learn how to connect using HDMI. This is the easiest method as you only need to connect the HDMI cable and the USB cable to your laptop....

1. Plug the HDMI cable into the top box (see picture above). Connect the other end to your computer.


2. Plug the USB cable into the bottom right connection on the wall. Connect the other end to your computer.


3. Turn the projector on using the power button on the projector or use the remote.

4. If you have a blue screen, you must change the input to HDMI 1. You can use SOURCE SEARCH on the remote or the projector (see above picture) or use the menu on the board following these steps...
- Click on the bottom right of the board. Click on the up arrow.


- Select the INPUT icon.

- Select HDMI 1.

- If your computer has never been connected to an Epson Projector, it may take 30 seconds to 1 minute for it to set up the drivers. A message will pop-up in the bottom right corner when the drivers are installed. It'll say something like "your USB device is now installed."
- Now you are set to go!
- Mac Users - Pens will work, but on my computer I couldn't get touch to work (as of 12/16/2015).

- If you want to interact with the computer from the board, make sure you are in PC Interactive Mode (computer and mouse icon). If you don't need to interact or only want to annotate over what's there, you can be in PC Free mode (projector and pen icon). Click here to learn the differences between the two.

- In another post, I will share tips and tricks for using ActivInspire with the Epson Projector - dual mode, touch input, and multi-users.
Friday, August 28, 2015
Turning On / Off Touch
To turn on/off the touch sensor....
Using your remote...
Using your remote...
- Click Menu on the remote.
- Arrow down to Extended, select (using return/click mouse button).
- Select Easy Interactive Function.
- Go down and select Touch Unit Setup.
- Select Power.
- Then turn it on or off based on your needs.
- Continue to hit ESC (right click mouse icon) until menu disappears.
Tuesday, August 25, 2015
Turning on/off Hovering on Epson Projector
With the remote...
- Click Menu on the remote.
- Arrow down to Extended - select by hitting enter/mouse click button.
- Select Easy Interactive Feature.
- Arrow down to Hovering - select your preference.
- Hit Esc until menu disappears.
Subscribe to:
Posts (Atom)