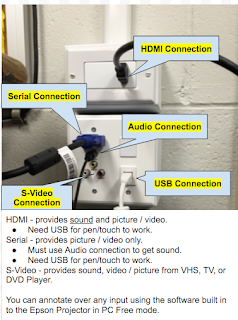
In our district there are two ways to hook a computer up to an Epson Projector - using HDMI or Serial cable. This picture shows the different types of connections that can be used with the projector. In this post, we'll learn how to connect using HDMI. This is the easiest method as you only need to connect the HDMI cable and the USB cable to your laptop....
1. Plug the HDMI cable into the top box (see picture above). Connect the other end to your computer.
2. Plug the USB cable into the bottom right connection on the wall. Connect the other end to your computer.
3. Turn the projector on using the power button on the projector or use the remote.
4. If you have a blue screen, you must change the input to HDMI 1. You can use SOURCE SEARCH on the remote or the projector (see above picture) or use the menu on the board following these steps...
- Click on the bottom right of the board. Click on the up arrow.
- Select the INPUT icon.
- Select HDMI 1.
- If your computer has never been connected to an Epson Projector, it may take 30 seconds to 1 minute for it to set up the drivers. A message will pop-up in the bottom right corner when the drivers are installed. It'll say something like "your USB device is now installed."
- Now you are set to go!
- Mac Users - Pens will work, but on my computer I couldn't get touch to work (as of 12/16/2015).
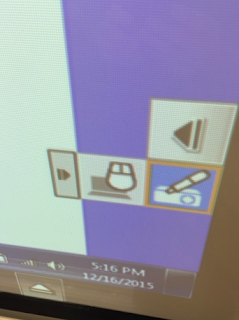
- If you want to interact with the computer from the board, make sure you are in PC Interactive Mode (computer and mouse icon). If you don't need to interact or only want to annotate over what's there, you can be in PC Free mode (projector and pen icon). Click here to learn the differences between the two.

- In another post, I will share tips and tricks for using ActivInspire with the Epson Projector - dual mode, touch input, and multi-users.


No comments:
Post a Comment